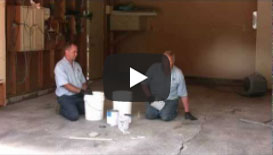
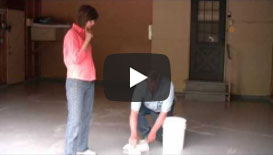
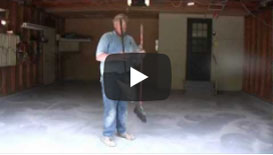
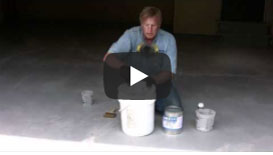
|
Instructions for applying Dura Seal 400 We are in the
process of preparing a YouTube video
series covering all of the steps for preparing a garage floor and
applying epoxy paint to it. New videos will be added to the series in
continuing updates. Please click here to
go to our page on How to Paint a Concrete Garage Floor. 1. Equipment
If possible, use a rotary scrubber (like a school janitor uses to clean
floors), preferably with grit type bristle. This is often called a cement
brush and having a little grit or carbide in the plastic bristles is best
(Nilo or Malo Grit). If not available, a black pad with pad driver can be
used. The better the tool, the less work for you. Additional equipment
items include wet/dry vacuum, floor squeegee, long-handled scraper, roller
cage with long handle, paint brush taped to a long handle, drill mixer or
paddle, as well as vapor mask and cartridges if sensitive to volatile
organic/acid vapors and odor.
2. Product mixing -
Defoamer: use 2 or 3 oz. in the
vacuum tank to keep foam down before sucking up each tank full of
cleaners and rinse water. If foam blocks the drain or vac, put a few
ounces of defoamer directly in the vac hose or drain. Note: do not put
defoamer on floor as it may cause finish problem.
- Mix Degrease Rite with water 2-to-1 for
clean surfaces, 1-to-1 for dirty surfaces. Apply by pouring pails-full
over the entire floor to allow it time to work and help your cleaning.
You can then scrub from end to end. The more time the cleaner has to
work against the surface, the less work you will need to do. Once you
have cleaned from end to end, use your squeegee to pull the liquid over
to your wet/dry vac or to a drain.
- Dura Kleen can be used at 100% if
applied evenly with a mop for hard smooth surfaces; mix 1 to 1 when you
do not have a mop to assure even distribution. Note that an even
application is important and that you may need to add fresh Dura Kleen
to your bucket as you dip into it to keep its pH level at strength. Once
you have applied from end to end on the area you are working on, scrub
from end to end. Then use your squeegee to pull the liquid over to your
wet/dry vac or to a drain.
- Scrub rinsing is a must to stop the
chemical action and avoid bubbles! Use a garden hose or pails of water
to saturate floor then scrub from end to end and remove as was done with
the detergents. Repeat if you find heavy suds persist. Breaking the
surface tension is needed and a pressure washer just can't break that
surface tension effectively.
- Final rinse. Use a garden hose, if you
can, to rinse debris from walls, corners, cracks, and cavities onto the
open floor. Then squeegee dry, and allow to dry until the floor turns
dry (usually a white color). Use a rag to absorb material that may seep
out of cavities back onto the floor. Watch for low spots that may have
water pooling and remove water with a rag or clean mop.
- It is very important to mix Dura Seal
for at least 200 strokes (or 2 minutes) to avoid soft spots. Soft spots
are a lot of work to fix so avoid them by attention to your mixing. Dura
Seal is a 1-to-1 mixture of epoxy to catalyst. Mix as much as you are
going to need before starting to apply. This will assure that there is
no color variation in your coat. Dura Seal does not harden in the can
for up to 20 hours after mixing if kept in a cool location with a lid.
The warmer it is, the faster Dura Seal will set up on the floor, usually
5 to 6 hours. Assign someone to mix the product as needed. It is a good
policy to set each kit of epoxy and catalyst in a stack to avoid
forgetting to mix in the catalyst. For a smooth floor, plan 325 sq. ft.
per gallon.
- Epoxy can get on things you did not
intend to coat. A little epoxy thinner can save you, your car seat, or
other items from damage. Thinner is to be used undiluted on fresh epoxy
to clean spills, hands, etc.
3. Surface Texture options
Gloss is the standard easy-maintenance look as applied from the can; clear
epoxy offers the best camouflage. A flat, non-gloss look can be achieved
if a flat catalyst is requested instead of the standard gloss catalyst.
For skid-resistant finishes, shark grip can be added to the mixed product.
Shark grip gives a texture like emery paper, yet is still easy to sweep
and squeegee. A shark grip topcoat gives a satin look and helps hide
imperfections. This look is the safest application for a good looking
surface, and is still relatively easy to keep clean. (Color quartz,
skid-resistant finishes are close to diamonds in hardness and will stand
up to steel wheels but require a thicker (Dura Poxy) finish for best
results.)
Color chips can give great looks but require some skill and must be
applied while the top coat is still quite wet (just a few minutes after
application). Color chips are usually not applied with color quartz
applications. Usually, simply throwing three finger pinches of chips
bounced off ceiling and wall every 8 ft. of wet application during the
second coat works well. Two-finger pinches can be used to fill in any
spots that need additional chips. If you like, you can use spiked
overshoes to walk over the applied color. You can also fill a pail (having
holes the size of your chips in the bottom), rotate the handle side to
side to shift out chips to achieve the desired look. Use about 1 lb. per
400 sq. ft. for a normal density of chips (about 5% coverage.)
Our epoxy melts at 400 degrees and gives off CO2. Water and steam
temperatures over 180 degrees can affect epoxy and urethane floors. Hot
metal from welding, etc. can damage epoxy floors leaving slight
discoloration burn marks ("cigarette" burns). Exposed edges where epoxy
meets other surfaces or stops can allow water, brake fluid, and other
liquids to work their way between your floor seal and the substrate and
should therefore be avoided.
4. Characteristics of Dura Seal 400
Dura Seal has a strong odor that lasts for 8 to 10 hours. Most office
staff will find the odors difficult to work in. Dura Kleen can produce a
strong sweet lemon smell and on occasion a hazy vapor cloud with an odor
that some find objectionable. A vapor mask can avoid discomfort from Dura
Seal odors. If odor is going to create problems, you can switch to Dura
Poxy which has no odor but covers less per gallon, increasing material
costs.
Dura Seal is a catalyzed product and will harden in 20 hours once mixed.
Any hardened product will have to be discarded. Do not glue down doors,
drains, etc. that are in contact with Dura Seal when it is wet. Dura Seal
hardens to 90% within 7 days and to its fullest extent over 28 days. Allow
it to set up at least 12 to 48 hours before use for best results. Dura
Seal will remain sticky in temperatures below 55 degrees. Dura Seal will
eventually harden but the longer it remains sticky the more vulnerable it
is to contamination from dirt, bugs, and other debris. If the epoxy
remains wet, avoid wind and warm the surface when possible. Do not use
kerosene or diesel fuel for heaters as they can discolor the coating. Do
not allow flame to make direct contact with the wet floor.
5. Application of Dura Seal 400
The first coat should be applied with rollers 9 in. or 18 in. wide. Wider
rollers can hide roller marks better. Airless sprayers are recommended for
larger wall areas. The second coat can go on after 5 or 6 hours. For
urethane topcoats, do it as soon as possible after each coat hardens.
Urethane coats are susceptible to air bubbles and using very thin coats
with an airless sprayer or 3/16" mohair roller spreading urethane poured
on the floor will help avoid air getting into the coating resulting in
bubbles forming. Epoxy coats can go on anytime once you can walk on the
floor and re-coats even years later are compatible. For the best-finished
look, we recommend using a screen-sanding disk on your scrubber between
coats. Be sure to sweep up the dust generated from sanding before applying
your final coat.
6. Repair of problems and irregularities
If there are imperfections or bubbles between coats, using a
screen-sanding disk on your scrubber between coats is required. If gases
are coming up through the floor it is sometimes safest to use our grout
compound to seal in the bubbles before your topcoat. If you see a small
hole at the base of bubble craters, this means gas can come up so glazing
is a smart precaution. Two workers can glaze in 1,200 sq. ft. of bubbles
in about an hour. Be sure to screen and to sweep up the dust generated
before a final coat. Leaves, rodents, bugs, etc. can get in the surface
when wet. Shave them off, and you often cannot see the problem.
7. Crack and Hole repair -
For eroded surfaces showing pits, using
our Dura Poxy Crack Filler may level holes and stones. This heavy-body,
100% epoxy does not shrink. It can be used to fill up holes, cracks, and
to float on eroded areas. Note that Dura Poxy is a honey-like mixture;
it lies flat but like honey, or even a water drop, its surface tension
will hold it slightly above its surrounding surfaces. To blend this
hardened product to be level with surrounding surfaces, allow it to
harden and then use a 4 in. grinder with a masonry disk to blend its
edges to match surrounding surfaces. Your second coat of Dura Poxy will
usually mask any slight scratches that the grinding leaves behind. For
larger, heavily eroded areas you can use a notched squeegee to pull out
the surface of Dura Poxy, then lightly follow with a 3/16" nap roller to
level out any rack marks. Often just using a 3/16" roller and pulling it
toward you like a squeegee will create a flat even surface over eroded
areas. What you see is what you get when it hardens. As with honey,
gravity will not make it go perfectly flat.
We do have several viscosities of Dura Poxy. Our thinner 914 series of
Dura Poxy flows more easily and may be better for large areas. Note that
cracks are often bottomless. The product may leak out the bottom of the
floor. If you suspect the crack to be bottomless, pour some sand in the
bottom of the crack and use our foam cord to fill the bottoms before
filling with epoxy. Use your grinder to even out surfaces so they blend
well. Dura Poxy can be forced out of deep holes by the weight of color
quartz creating uneven volcano-like edges that may need to be ground
off. To avoid these, mix a peanut-butter-like trowel mix of color quartz
and epoxy to pre-fill deep areas. You may then coat over these trawled
areas even before they harden.
- For hairline cracks, we recommend using
our grout compound after your first Dura Seal coat. Just use a putty
knife to fill the hairline cracks. Once the cracks are filled and
hardened, use a sanding screen on your floor scrubber to remove the
excess and to blend the edges so the cracks will disappear. Grout
compound is too soft for large holes but can be used to fix hairline
cracks and for light applications can be used in a pinch to fix
irregularities missed when doing the Dura Poxy work.
8. Stripping old finish
This can be achieved by apply our 922 stripper. Wait 25 minutes and use a
scraper or scrape-away tool to remove and then begin with step # 2 above.
Full stripping may not be required. Often, using a 4 in. long handled
scraper as you are doing your cleaning prep can remove all the previous
finish that is about to come off the floor. Then your coating can adhere
to the finish that remains with a minimum of risk. If it will be a problem
to see some of your old finish though your topcoats, then full removal may
be needed. |